Walk Through – Configuring Monitoring in Lync Server 2010 (Part 15)

In this walkthrough, you will configure the Monitoring server role. First verify the Monitoring policy for CDR and QoE has been enabled by default and that all services are running. Then configure SQL Server Reporting Services and deploy monitoring server reports.

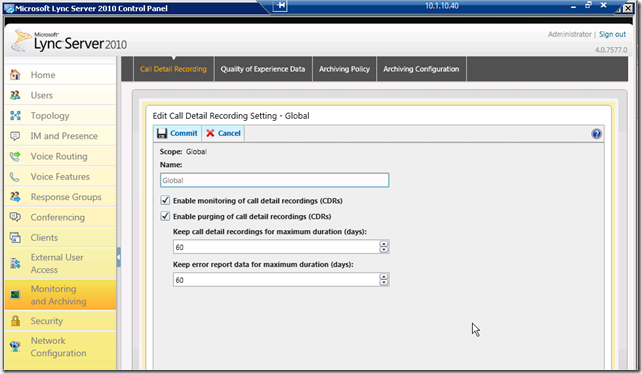
On the Lync FE Lync Server Control Panel, click Monitoring and Archiving. On the Call Detail Recording tab, double-click Global.

image

On the Edit Call Detail Recording Setting – Global page, verify the Enable monitoring of call detail recordings and Enable purging of call detail recordings check boxes are selected and then click Commit.

image

Click the Quality of Experience Data tab, and then double-click Global.

image

On the Edit Quality of Experience Setting – Global page, verify Enable monitoring of Quality of Experience (QoE) data and Enable purging of Quality of Experience (QoE) data check boxes are selected and then click Commit.

image

On Lync FE Topology Builder, add the monitoring server and publish.

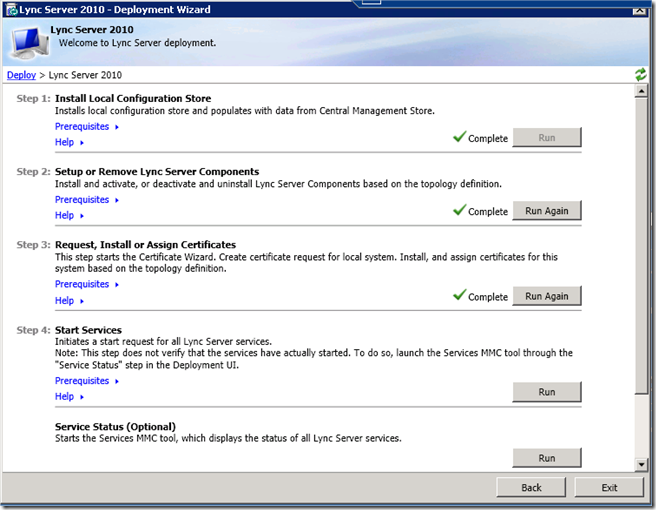
On Monitoring Server, Install the Monitoring Server Role by using “Install or Update Lync Server System”. Follow the steps from 1 to 2. 

image

image

On SQL Server, click Start, click All Programs, click Microsoft SQL Server 2008 R2, click Configuration Tools, and then click Reporting Services Configuration Manager.

image

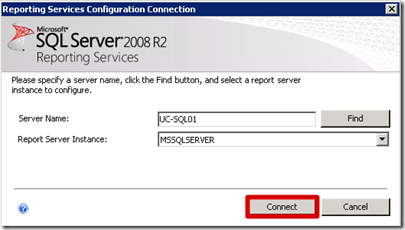
On the Reporting Services Configuration Connection page, verify that the Server Name, and then in the Report Server Instance drop-down list, click MSSQLSERVER and click Connect.

image

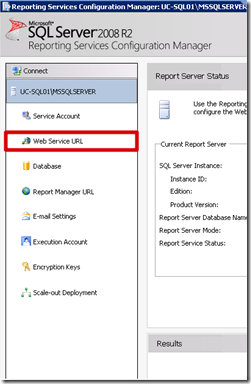
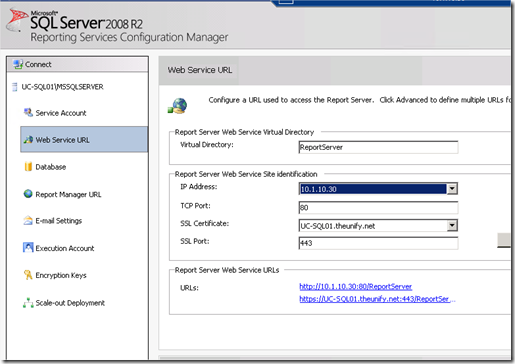
In the Reporting Services Configuration Manager, under Connect, along the left side, click Web Service URL.

image

On the Web Service URL page, in the SSL Certificate drop-down list, click UC-SQL01.theunify.net, and then at the end of the page, click Apply.

image

Wait as the certificate is applied. Notice the URLs listed on the page, and then click Exit to close Reporting Services Configuration Manager.

On Monitoring Server, click Start, click All Programs, click Microsoft Lync Server 2010, and then click Lync Server Deployment Wizard. 2. In the Deployment Wizard, click Deploy Monitoring Server Reports on the right side of the page.

image

On the Specify Monitoring Server page, review the settings, and then click Next.

image

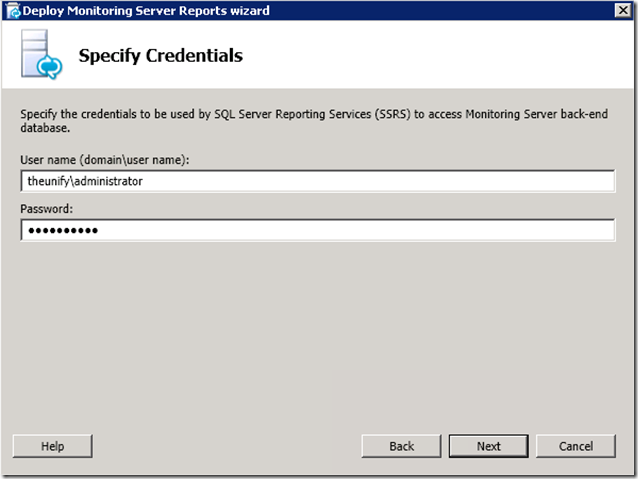
On the Specify Credentials page, enter domain credential, and then click Next.

image

On the Specify Read-Only Group page, in the User group box, type RTCUniversalReadOnlyAdmins, and then click Next.

image

On the Executing Commands page, when the status shows as Completed, click Finish. This command will take 3-4 minutes to complete.

Once the Monitoring Report Pack completed, you may start to view the report.

See you next year and have a Happy New Year!!

Posted in Microsoft Lync Server 2010 | Leave a comment

Walk Through – Configuring Archiving in Lync Server 2010 (Part 14)


Today, I’m going to continue to through how to configure Archiving Server Role.

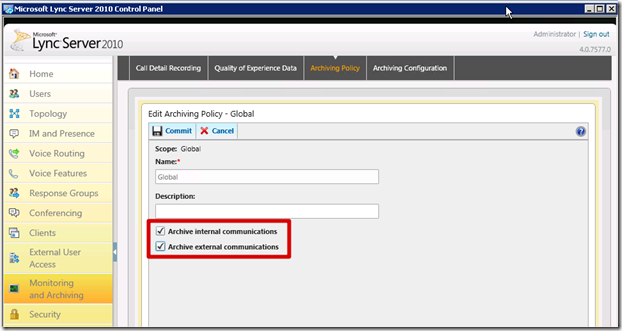
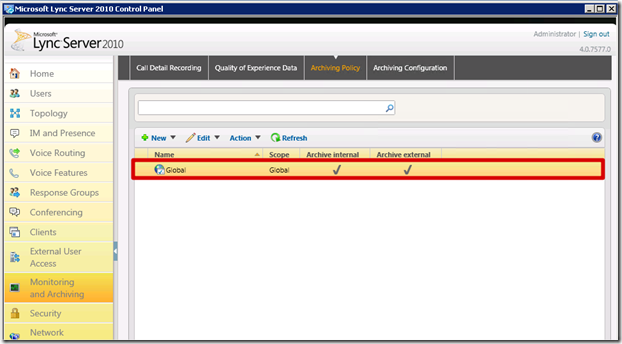
On Lync Front End Server, go to Lync Server Control Panel. At the CSCP, click Monitoring and Archiving, and then click the Archiving Policy tab. Double-click Global. On the Edit Archiving Policy – Global page, select the Archive internal communications and Archive external communications check boxes, and then click Commit.

image

image

At the Monitoring and Archiving, Select Archiving Configuration.

image

Double-click Global. In the Edit Archiving Setting – Global page, in the Archiving setting drop-down list, click Archive IM and web conferencing sessions. Select the Block instant messaging (IM) or web conferencing sessions if archiving fails check box, Select the Enable purging of archiving data check box. In the Purge exported archiving data and stored archiving data after maximum duration box, type or select 60, (or you may type your number of days to purge) and then click Commit.

image

Once done, the archiving has been started. In order to have Archiving Policy to be take place, all Lync Users must sign out and sign in again.

If you want to view archived data, you need to go to the Back End Server (SQL) using SQL Server Management Studio. 

In Microsoft SQL Server Management Studio, click New Query.
In the SQLQuery1.sql window, type the following:

USE LcsLog
GO  SELECT * FROM Messages

Click Execute. In the query results, scroll over to the Body column and view the results. You should be able to see the messages from the conversations you just had.

On the FileShare server, right-click Start, and then click Open Windows Explorer. In Windows Explorer, navigate to C:\FileShare\1-ArchivingServer-1\DataConf.

Inside this folder will be a subfolder with a hashed name. Open that subfolder and then open the folder inside that to view the archived data.  The files shared during the generated traffic in the previous task should all be in this folder.

Hope this is useful. Next post, I will walkthrough how to configure monitoring server role.

Merry Christmas!!!

Posted in Uncategorized | 2 Comments

Walk Through – Microsoft Exchange Server 2010 SP1Unified Messaging Integration (Part 13)

Today post is about how Lync can integrate with Exchange 2010 UM Role. There is a few good article about how to do it. So I will not re-post again.

Like http://blogs.technet.com/b/drrez/archive/2011/06/02/microsoft-lync-server-2010-resource-kit-exchange-um-integration.aspx

http://blog.schertz.name/2010/11/lync-and-exchange-um-integration/

For those like to integrate Lync to Exchange Online UM.

http://help.outlook.com/en-us/140/gg702674.aspx

http://www.lynclog.com/2012/02/lync-2010-on-prem-cloud-um-integration.html

Next post, I will talk about how to install Lync Monitoring & Archiving Server.

Posted in Microsoft Lync Server 2010 | 2 Comments

Walk Through – Lync Server 2010 Conferencing Configuration (Part 12)


Hi, we have finish the Enterprise Voice configuration. Next, I would like to post is the Conferencing configuration.

In this post, we will configure dial-in conferencing by configuring Dial-In conferencing numbers. We will also be using Lync Server Management Shell to test the dial-in access number.

We will be using the following information.

Field Value
Display number +6531525567
Display name SG Dial-in Conferencing Number
Line URI tel:+6531525567
SIP URI Sip:SGCAA@theunify.net
Pool UC-LSFE01.theunify.net
Primary language English (United States)
Secondary Languages
Associated Regions SEAsia

First we need to Configure regions for the dial plans.

On Lync Server 2010, and then click Lync Server Control Panel. And click Voice Routing.

image

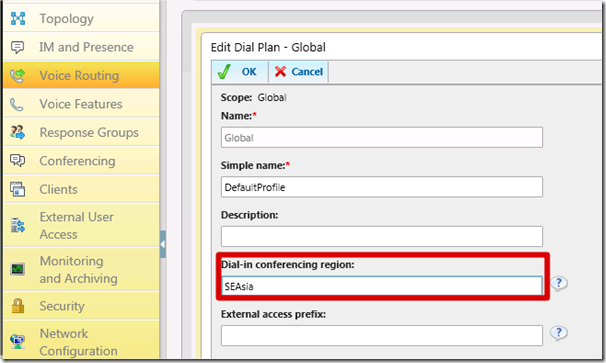
On the Dial Plan tab, double-click the Global dial plan. On the Edit Dial Plan – Global page, in the Dial-in conferencing region box, type SEAsia, and then click OK.

image

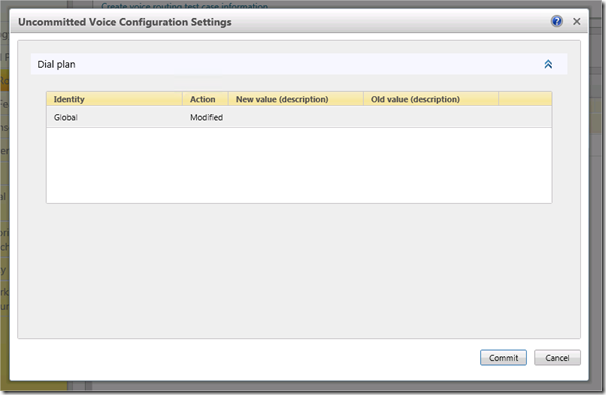
Click the Commit menu, and then click Commit all. On the Uncommitted Voice Configuration Settings page, click Commit.

image

Next, Create the dial-in access number for the SEAsia region.

On the Lync Server Control Panel, click Conferencing, and then click the Dial-in Access Number tab.

image

Click New. On the New Dial-in Access Number page, in the Display number box, type +6531525567.

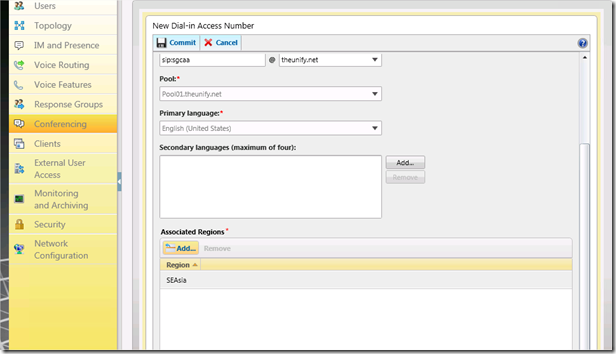
In the Display name box, type SG Dial-in Conferencing Number. In the Line URI box, type tel:+6531525567. In the SIP URI box, type sip:SGCAA, and then click “theunify.net” in the drop-down list. In the Pool drop-down list, click UC-LSFE01.theunify.net. In the Primary language drop-down list, click English (United States).

image

You may also add secondary languages if you want. Under Associated Regions, click Add. In the Select Regions window, click SEAsia Region, and then click OK. On the New Dial-in Access Number page, click Commit.

image

image

image

Now, we need to test the dialin conferencing that we have created.

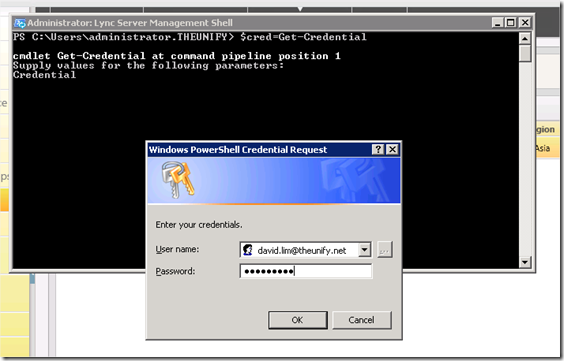
On Lync Server Management Shell. type the following command, and then press Enter. $cred = Get-Credential

image

At the Windows PowerShell Credential Request window, in the User name box, enter the user credential and then click OK.

In the Lync Server Management Shell, type the following command, and then press Enter. Test-CsDialInConferencing –UserSipAddress sip:david.lim@theunify.net –UserCredential $cred –TargetFqdn uc-lsfe01.theunify.net
 
Verify the results show as Success.

After the test, now we need to Configure Conferencing Policies

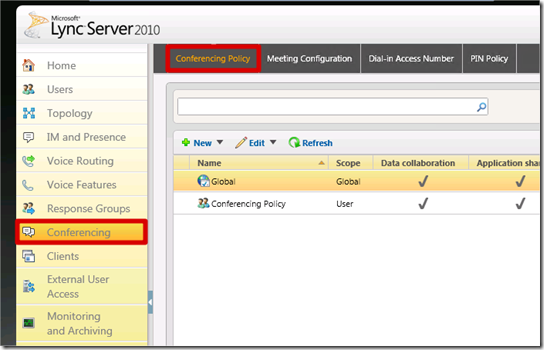
On the Lync Server Control Panel, click Conferencing, and then click the Conferencing Policy tab. Double-click Global.

image

On the Edit Conferencing Policy – Global page, ensure to Clear the Enable PSTN dial-in conferencing check box. Click Commit to save the changes.

image

Next, Create the site conferencing policies.

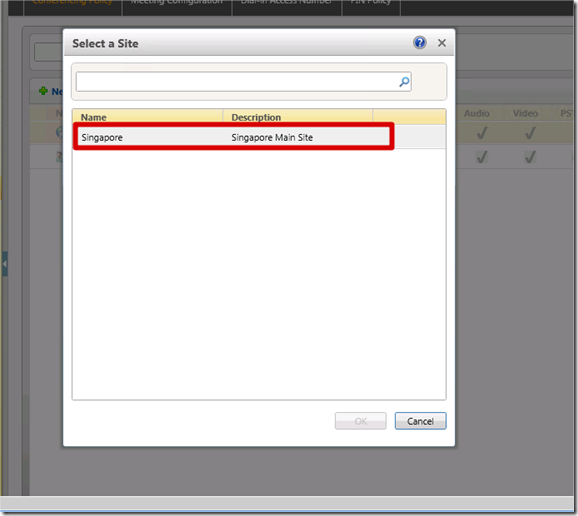
On Lync Server Control Panel-Conferencing Policy tab, click New, and then click Site policy. In the Select a Site window, click Singapore, and then click OK.

image

On the New Conferencing Policy – Singapore page, verify the Enable PSTN dial-in conferencing check box is selected and leave the rest as defaults. Click Commit to save the changes.

Lastly, create a user conferencing policy with unrestricted conferencing policy.

On Conferencing Policy tab, click New, and then click User policy. On the New Conferencing Policy page, in the Name box, type Unrestricted Conferencing Policy. In the Description box, type Singapore’s unrestricted conferencing policy. In the Recording drop-down list, click Enable Recording. Select the Allow federated and anonymous participants to record check box. Select the Allow anonymous participants to dial out check box. Select the Allow federated and anonymous participants to take control check box. Select the Enable peer-to-peer recording check box, and then click Commit.

image

and that it. See you next post!

Posted in Microsoft Lync Server 2010 | 2 Comments

Walk Through – Lync Server 2010 Enterprise Voice – Unassigned Numbers (Part 11)

In this post, we will configure the unassigned numbers feature of Lync Server 2010. We will create announcements for Singapore Site, and another number for the executive number range that transfers the call to the operator. Then configure unassigned numbers for the sites, including one that is specific to the executive number range.

In the Lync Server Management Shell, type the following command, and then press Enter:
New-CSAnnouncement –Name “Singapore Unassigned Number Announcement” -TextToSpeechPrompt “The number you have called is currently out of service. Check the number and try your call again.” –Language “en-US” –Identity “service:ApplicationServer:pool01.theunify.net” –Verbose

image

In the Lync Server Management Shell, type the following command, and then press Enter:
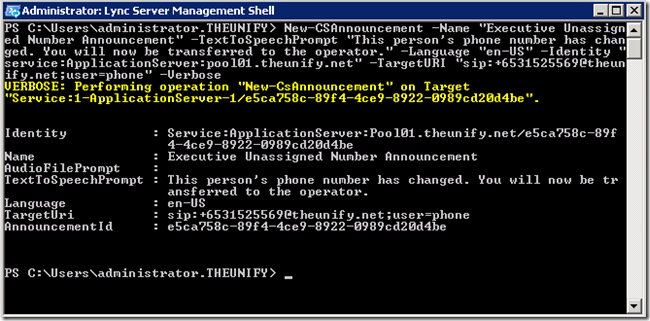
New-CSAnnouncement –Name “Executive Unassigned Number Announcement” –TextToSpeechPrompt “This person’s phone number has changed. You will now be transferred to the operator.” –Language “en-US” –Identity “service:ApplicationServer:pool01.theunify.net” –TargetURI “sip:+6531525569@theunify.net;user=phone” –Verbose

image

Next we create an Unassigned Number range.

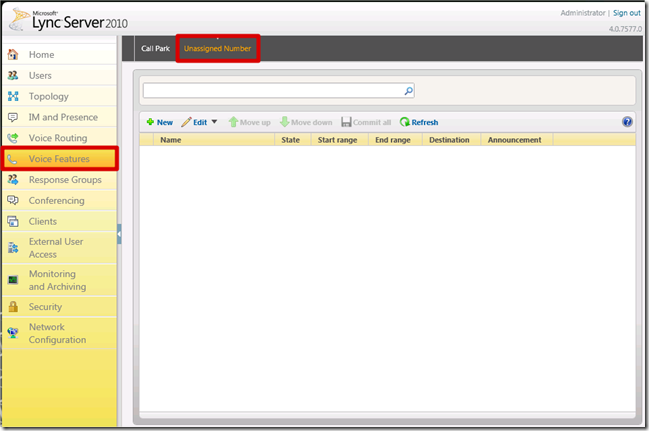
In the Lync Server Control Panel, click Voice Features.

image

Click the Unassigned Number tab, and then click New.

On the New Unassigned Number Range page, in the Name box, type Singapore Internal Numbers. First Number range box, type tel:+6531525500. In the second Number range box, type tel:+6531525599.

Leave Announcement selected in the Announcement service drop-down list. Next to FQDN of destination server, click Select.

In the Select an Announcement Service window, click ApplicationServer:pool01.theunify.net, and then click OK.

image

Under Announcement, click Singapore Unassigned Number Announcement from the drop-down list, and then click OK.

On the Unassigned Number tab, click New. On the New Unassigned Number Range page, in the Name box, type Executive Numbers. The first Number range box, type tel:+6531525600. The second Number range box, type tel:+6531525699.

Leave Announcement selected in the Announcement service drop-down list. Next to FQDN of destination server, click Select.

In the Select an Announcement Service window, click ApplicationServer:pool01.theunify.net, and then click OK.

Under Announcement, click Executive Unassigned Number Announcement from the drop-down list, and then click OK.

image

On the Unassigned Number tab, click Commit All.

image

Next post, we will assign the number to the users.

Posted in Microsoft Lync Server 2010 | 7 Comments

Walk Through – Lync Server 2010 Enterprise Voice – Call Parking (Part 10)

Next we go for Call Park. In this post, we will configure Call Park. First we configure a Call Park Orbit that starts at *500 and ends at *599. Then, enable Call Park and Music on Hold on the various voice policies.

In the Lync Server Management Shell, type the following command, and then press Enter:
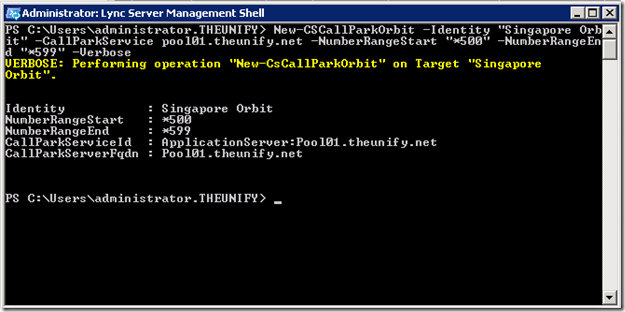
New-CSCallParkOrbit –Identity “Singapore Orbit” –CallParkService Pool01.theunify.net –NumberRangeStart “*500” –NumberRangeEnd “*599” –Verbose

image

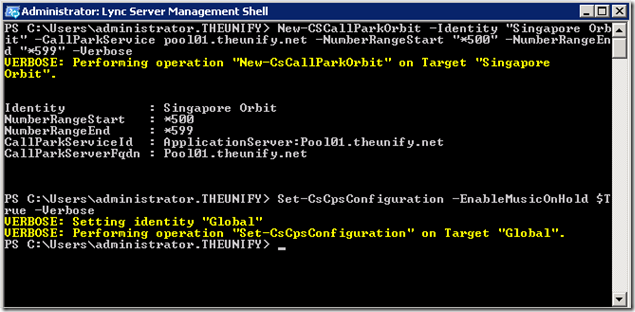
Next, configure Music on Hold and enable Call Park.

Set-CsCpsConfiguration –EnableMusicOnHold $True –Verbose

image

In the Lync Server Management Shell, type the following command, and then press Enter:
Get-CsVoicePolicy | Set-CsVoicePolicy –EnableCallPark $True –Verbose

image

and you are done. Next post, we will cover Unassigned Numbers.

Posted in Microsoft Lync 2010 | Leave a comment

Walk Through – Lync Server 2010 Enterprise Voice Functionality (Part 9 – II)

sorry for the long waiting. Let continue the deployment for Enterprise Voice.

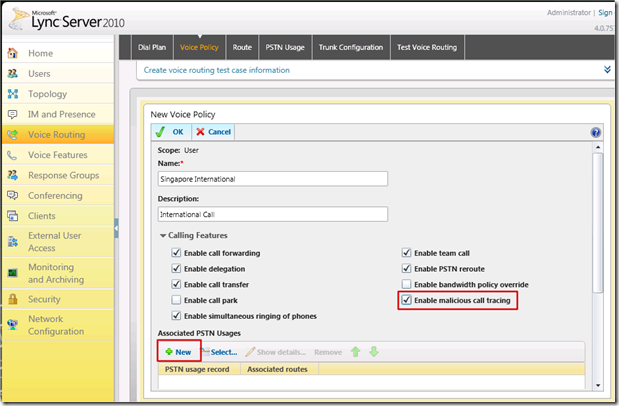
On the Lync Server Control Panel, click Voice Routing, and then click the Voice Policy tab. Click New, and then click User policy. In the Name box, type Singapore International. Select the Enable malicious call tracing check box.

Under Associated PSTN Usages, click New.

image

On the New PSTN Usage Record page, in the Name box, type Singapore Local, and then click OK. (Repeat the same steps to create two more PSTN usages)

image
On the New Voice Policy page, click OK. So now we have create a policy for International Call. now we need to create a policy for Local call only.

Click New, and then click User policy. In the Name box, type Singapore Local. Select the Enable malicious call tracing check box. Under Associated PSTN Usages, click Select.
On the Select PSTN Usage Record page, select the following PSTN usages, Singapore Local and then click OK

we have done for user policy. now is the site turn.

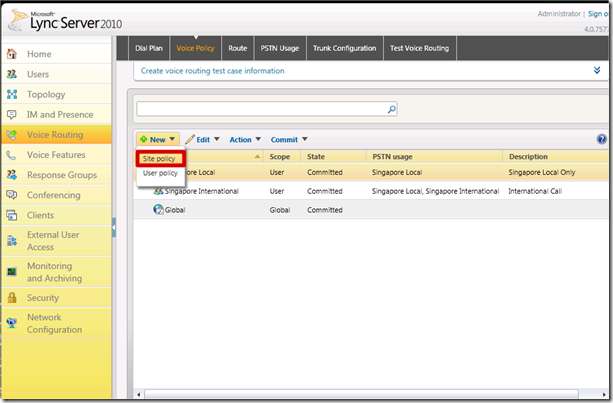
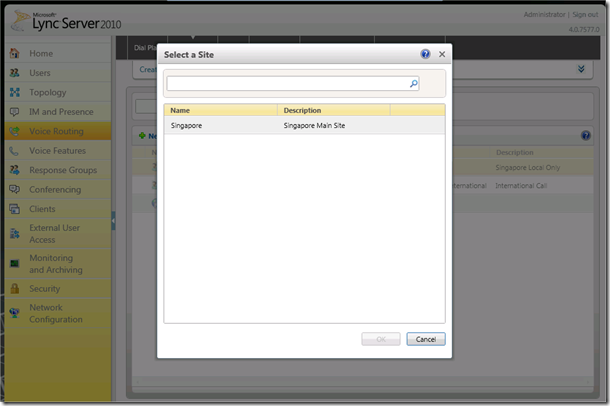
Click New, and then click Site policy. On the Select a site page, select Singapore, and then click OK.

image

image

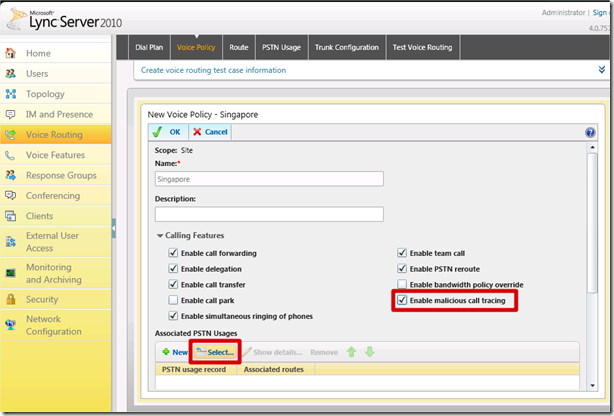
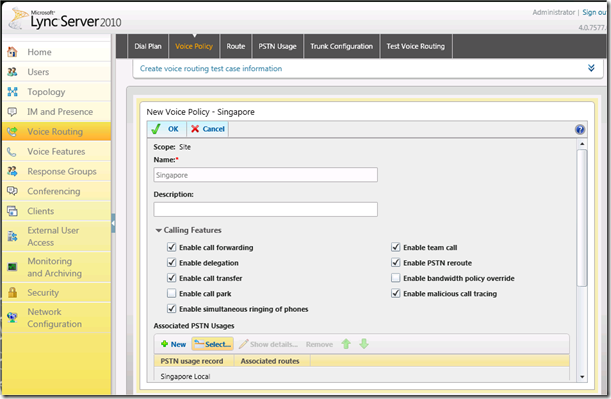
Select the Enable malicious call tracing check box. Under Associated PSTN Usages, click Select. On the Select PSTN Usage Record page, click Singapore Local, and then click OK.

image

 image

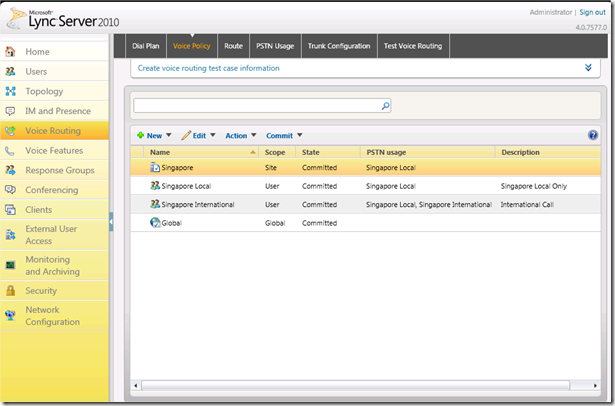
On the New Voice Policy – Singapore page, click OK and click commit.

image

So we have done the policy, now is the route and trunk configuration.

In Lync Server Control Panel, click Voice Routing, and then click the Route tab and Click New.

image

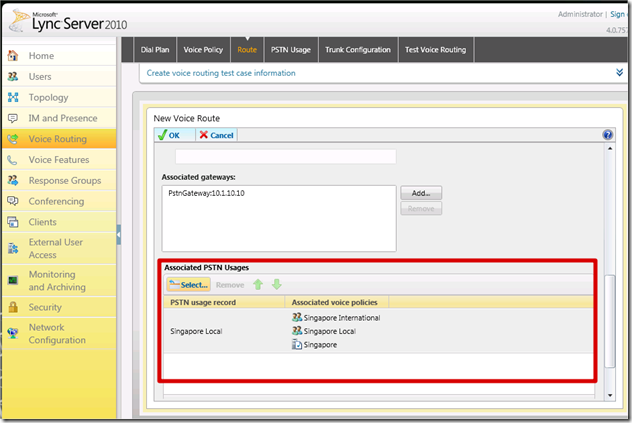
On the New Voice Route page, in the Name box, type Singapore Local.


In the Starting digits for numbers that you want to allow: box, type +65, and then click Add. The Match this Pattern field should then display ^\+65.

image

Next to the Associated gateways box, click the Add button.

image

In the Select Gateway window, click PstnGateway:x.x.x.x, that you have created and then click OK.

image

On the Associated PSTN usages table toolbar, click Select. In the Select PSTN Usage Record window, press and hold the Ctrl key, click Singapore Local and then click OK.

image

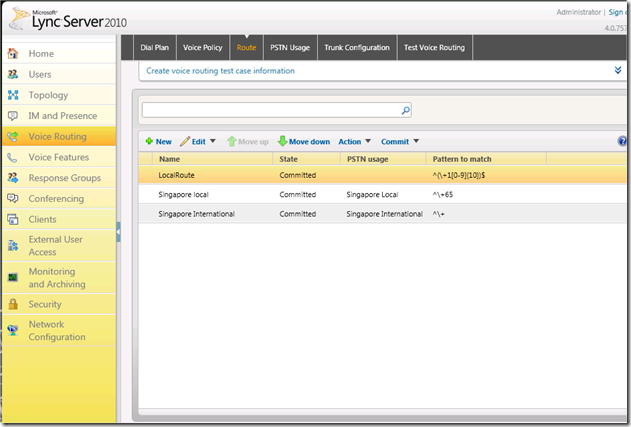
On the New Voice Route page, click OK. Apply the same for International Call Route.

image

In the Lync Server Control Panel, click the Trunk Configuration tab.

image

Click the New drop-down menu, and then click Site Trunk.

image

In the Select a site window, click Singapore, and then click OK.

image

In the Encryption support level drop-down menu, click Optional, Clear the Enable refer support check box.

image

On the Associated Translation Rules toolbar, click New.

image

On the New Translation Rule page, in the Name box, type SG PSTN. In the Starting digits box, type +65, In the Length drop-down list, set the length to Exactly 11 and in the Digits to remove box, set the value to 3. Leave the Digits to add box blank.

Verify that the Pattern to match field reads ^\+65(\d{8})$. and verify that the Translation rule field reads $1, and then click OK.

image

Use this to create one more translation rule.

After you have done this, apply the Voice Policy to the user. And you are all set.

Posted in Microsoft Lync Server 2010 | 3 Comments

Walk Through – Lync Server 2010 Enterprise Voice Functionality (Part 9 – I)

Hi Lets continue the deployment of Lync.

Today I’m going to talk about how to configure Enterprise Voice function and it will cover below function in Lync Server 2010. This will break into 2 parts.

Part I

  1. Edit the topology to include the PSTN gateways.
  2. Publish the new topology.
  3. Create Dial Plans
  4. Create Normalization Rules

Part II

  1. Configuring Voice Policies and PSTN Usages
  2. Configuring Routes and Site Trunks
  3. Configuring Call Park
  4. Configuring the Unassigned Numbers Feature
  5. Configuring Users for Enterprise Voice
  6. Testing and Verifying Enterprise Voice Functionality

OK… let start!!

On the Lync FE, click Start, click All Programs, click Microsoft Lync Server 2010, and then click Lync Server Topology Builder. On the Topology Builder page, click Download topology from existing deployment, and then click “OK”

In the Save Topology As window, save the file on the Desktop as EV.tbxml, and then
click Save.

In the Topology Builder, expand the Central Site, and then click PSTN Gateways. Right-click PSTN Gateways, and then click New IP/PSTN Gateway.

image

On the Define New IP/PSTN Gateway page, enter the following information to create the gateway, and then click OK. For my case, my gateway IP is 10.1.10.10 and I use the default listening port which is 5066.

image

Expand Standard Edition Front End Servers or Enterprise Edition Front End Servers. And Right-click Lync FE Pool, and then click Edit Properties.

On the Edit Properties page, Scroll-down to Mediation Server, and if not already selected, select the Enable TCP port check box. Next to Listening ports, leave it to default in the TCP box, or type 5068.

In the lower box, select the 10.1.10.10 gateway, click Add, and then click OK.

image

In the Topology Builder, right-click Lync Server 2010, and then click Publish Topology.

On the Publish the Topology page, click Next. When the Publishing wizard complete page, verify that all of the steps show as Success, and then click Finish.

Now, once the gateway has been publish. next step is configure the Enterprise Voice Dial Plans and Normalization Rules.

Dial Plan

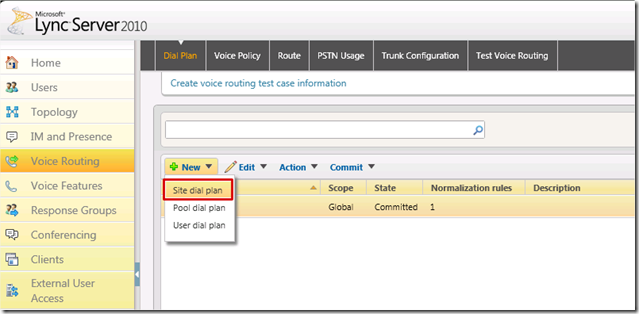
Go to Lync Server Control Panel, click Voice Routing. On the Dial Plan tab, click New, and then click Site dial plan.

image

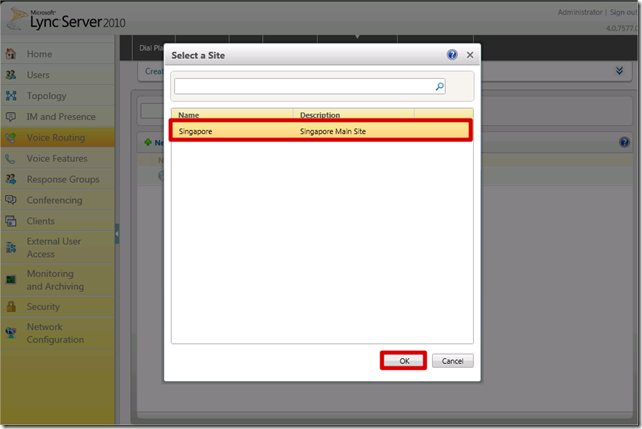
On the Select a Site page, click the site name, and then click OK.

image

In the Simple Name box, type a name that is easy to identify by you or the administrator, and then scroll down.

Under Associated Normalization Rules, click the Prefix All rule, and then click Remove. And click New.

On the New Normalization Rule page, in the Name box, type Local Call.
In the Starting Digits box, leave it blank
In the Length drop-down list, click Exactly.
In the Length box, type or select 8.
In the Digits to remove box, type or select 0.
In the Digits to add box, type +65.
In the Dialed number to test box, type 8 digit number, and then click Go.
Verify that +65(8 digit) appears in next to Normalized number:
Click OK to close the New Normalization Rule page.

image

When finished, click OK on the Edit Dial Plan. Click the Commit drop-down menu, and then click Commit All.

image

In the Uncommitted Voice Configuration Settings window, click Commit. Close the Successfully published voice routing configuration message window.

image

That all. we will continue the rest on part II

Posted in Microsoft Lync Server 2010 | Tagged | 5 Comments

Walk Through – Lync Server 2010 & Exchange Server 2010 OWA Integration (Part 8)


last post, we finish off the deployment of the Lync server. now I going to walk through the integration of Lync and Exchange 2010 OWA. so that you can IM using OWA and also see the presence of the users.

Since the Exchange and Lync server that we installed is using Windows Server 2008 R2, we must install the UCMA 2.0 and OCS 2007 R2 web services. to do this, we need to download some files

UCMA 2.0 : http://go.microsoft.com/fwlink/?LinkID=198175 (this is a Unified Communications Managed API 2.0 Core runtime)

Microsoft Office Communications Server 2007 R2 Web Service Provider : http://go.microsoft.com/fwlink/?LinkId=199440 (this content four files after you unzip: CWAOWAASSP.msi, Donnetfx35setup.exe, UcamRedist.msi and vcredist_x64.exe.

PrtScr capture_3

Lastly, OCS 2007 R2 Hotfix Web Service Provider : http://go.microsoft.com/fwlink/?linkid=199437

PrtScr capture_2

Once you have downloaded all the files, we can start to do the installation and integration.

First, we start with UCMA 2.0

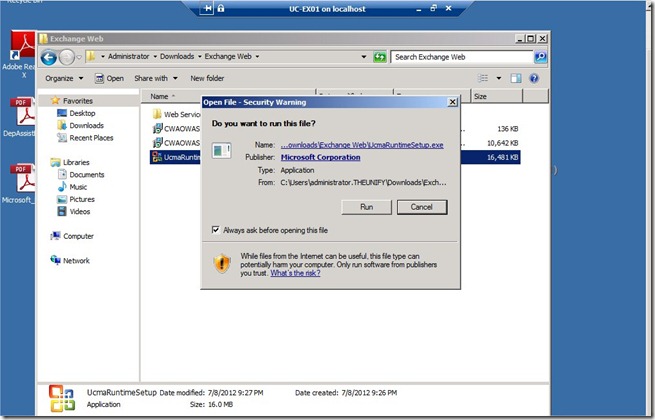
Double click the setup file for UcmaRuntime.exe, and click “Run”

PrtScr capture_4

Click “Install”

Second, install the OCS 2007 R2 Web Services. go to the folder “Web Service Provider Package Installer”, by default packages are extracted to the folder C: \ Web Service Provider Package Installer.

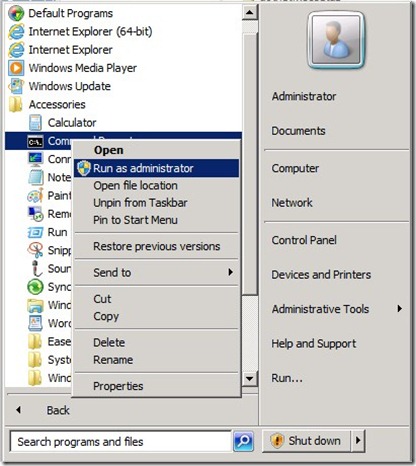
you are require to run the service in command prompt as administrator.

PrtScr capture_5

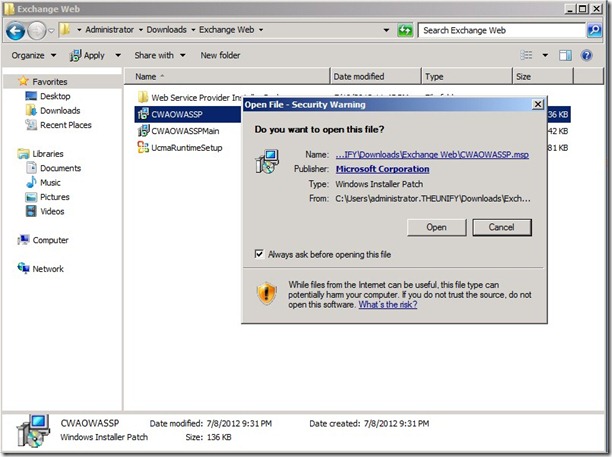
Locate the file CWAOWAASSP.msi and execute it.

PrtScr capture_6

after installed. we run the CWAOWASSP.msp hotfix.

PrtScr capture_7

after all installation is done. now, power up the Exchange Management Shell. and enter the following command.

Get-ExchangeCertificate | fl

PrtScr capture_8

and look for Thumbprint field with IIS service and copy the result to a notepad. also remember the Certificate Subject, when we configure the list of authorized hosts in Lync Server will have to configure the Certificate Subject to the name of the authorized host and create the Trusted Application Pool with this name.

image

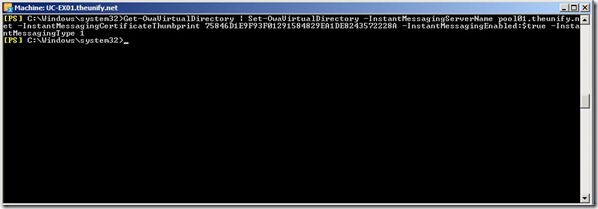
In Exchange Management Shell commands are run

Get-OwaVirtualDirectory | Set-OwaVirtualDirectory-InstantMessagingServerName Name> Server Lync> InstantMessagingCertificateThumbprint <Thumbprint-Client Certificate Access> $ True-InstantMessagingEnabled InstantMessagingType-1

PrtScr capture_12

after we have run the command, do a iisreset.

PrtScr capture_13

next is Lync turn.

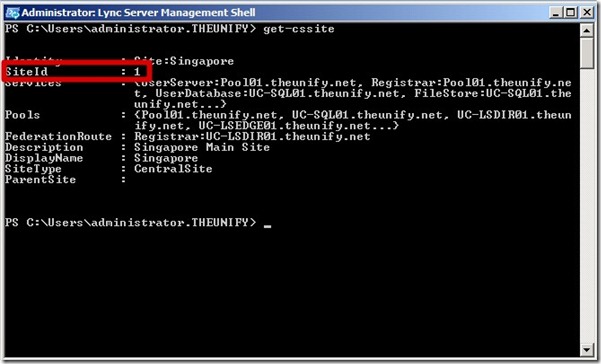
go to Lync Server, open the Lync Management Shell and run Get-CSSite

PrtScr capture_14

take note of the Site ID.

next, we create the Trusted Application in Lync Server. you can create using Power Shell or Topology Builder.

New-CsTrustedApplicationPool –Identity <Certificate Subject Name of Client Access> –ThrottleAsServer $true -TreatAsAuthenticated  $true -ComputerFQDN <FQDN Server Exchenge> –Site <SiteID> –Registrar <Lync Pool Server> –RequiresReplication $ false

after that, run Enable-CsTopology to apply the setting.

Next, is to configure the ports. this port can be any available port

New-CsTrustedApplication -ApplicationId <application name> -TrustedApplicationPoolFqdn Name> Certificate Subject Name of Client Access> -Port <port number>

PrtScr capture_17

run last time of Enable-CsTopology.

you may also want to reference to http://blog.schertz.name/2010/11/lync-and-exchange-im-integration/

Now, login to Exchange OWA. you will be able to see the presence of the user and you can also IM to the user.

That all for now, see you next time!!

Posted in Microsoft Exchange Server 2010, Microsoft Lync Server 2010 | Leave a comment

Walk Through – Lync Server 2010 Edge Deployment (Part 7)

Last week, we stop at exporting of the configuration file from Lync FE to Lync Edge.

This week, let’s continue the installation.

On the Edge Server, right-click Start, and then click Open Windows Explorer. Navigate to Lync Setup.exe. and double click. Wait a few moments for setup to start.

On the Installation Location page, leave the default location and click Install. On the License Agreement page, select the I accept the terms in the license agreement check box,
and then click OK.

On the Lync Server 2010 – Deployment Wizard page, click Install or Update Lync Server System.

PrtScr capture

On the Lync Server 2010 – Deployment Wizard page, next to Step 1: Install Local Configuration Store, click Run.
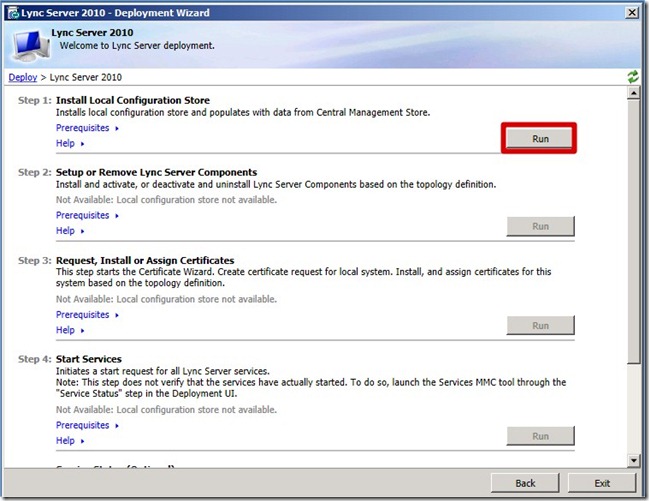
PrtScr capture_2

On the Configure Local Replica of Central Management Store page, verify that Import from a file is selected, and then click Browse.

PrtScr capture_3

Navigate to the location that store Config.zip, click Open, and then click Next.
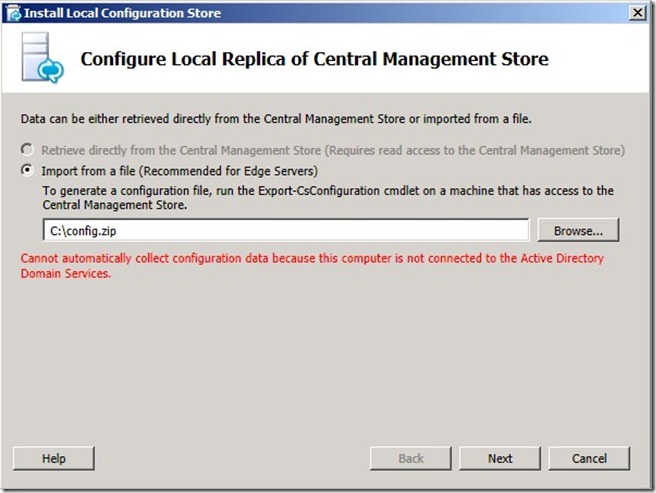
PrtScr capture_4

On the Executing Commands page, when the Task Status shows as Completed, click Finish.

PrtScr capture_5

On the Lync Server 2010 – Deployment Wizard page, next to Step 2: Setup or Remove Lync Server Components, click Run.

PrtScr capture_6

On the Setup Lync Server components page, click Next.
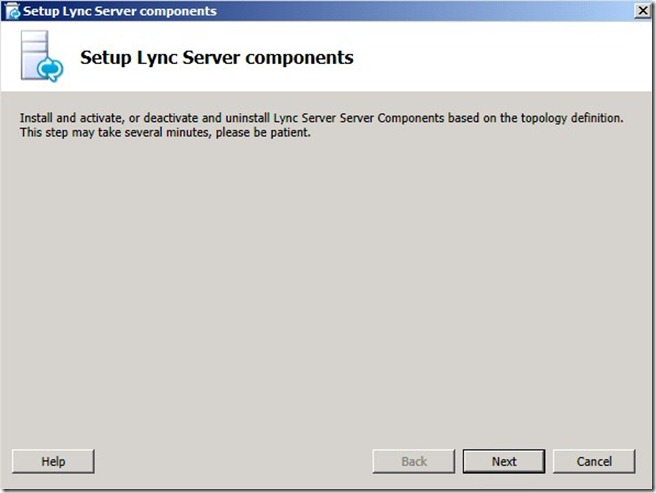
PrtScr capture_7

On the Executing Commands page, when the Task Status shows as Completed, click Finish.

PrtScr capture_8

Request and assign certificates.

After you have done the first two steps. Now you come to the certificate. you will use private certificates from the internal CA, for internal Edge.

On Lync Edge, on the Lync Server 2010 – Deployment Wizard page, next to Step 3: Request, Install or Assign Certificates, click Run. (due to I already run once, that why you will see “Run Again”

PrtScr capture_9

In the Certificate Wizard window, verify that Edge Internal is selected, and then click Request.

PrtScr capture_10

On the Certificate Request page, click Next.

PrtScr capture_11

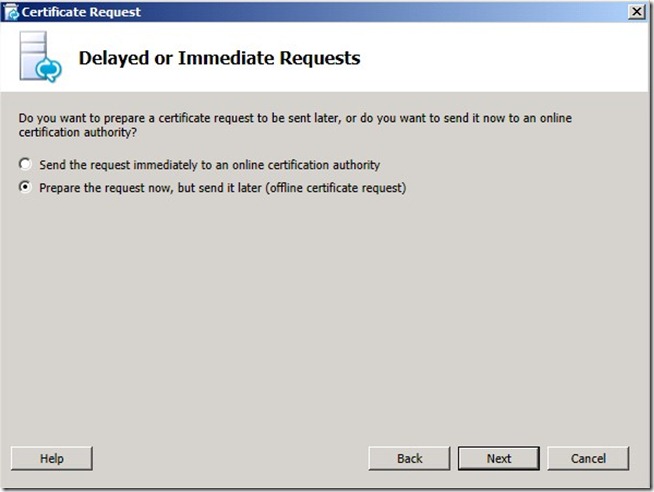
On the Delayed or Immediate Requests page, verify that Send the request immediately to an online certification authority is not selected, and then click Next.
PrtScr capture_12

On the Certificate Request File page, enter the path and file name and then click Next.

PrtScr capture_13

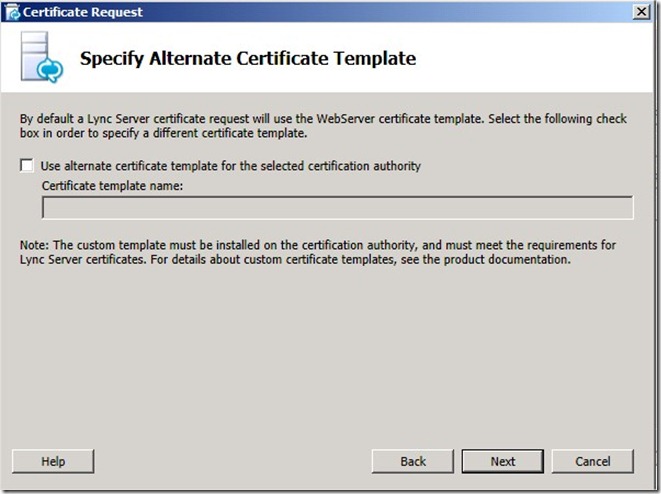
On the Specify Alternate Certificate Template page, leave the check box clear, and then click Next.
PrtScr capture_14

On the Name and Security Settings page, in the Friendly Name box, enter the name of the Internal Cert, verify that the Bit Length is 2048, and then click Next.

PrtScr capture_15

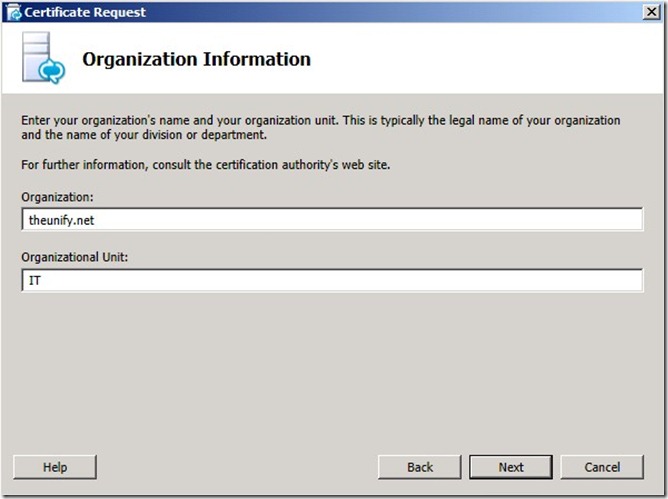
On the Organization Information page, in the Organization box, enter the organization name. In the Organizational Unit box, type IT, and then click Next.
PrtScr capture_16

On the Geographical Information page, in the Country/Region drop-down list, click the country you belong to. In the State/Province box, type the state. In the City/Locality box, type the city, and then click Next.

PrtScr capture_17

On the Subject Name/Subject Alternate Names page, review the Subject Name that is automatically populated, and then click Next.

PrtScr capture_18

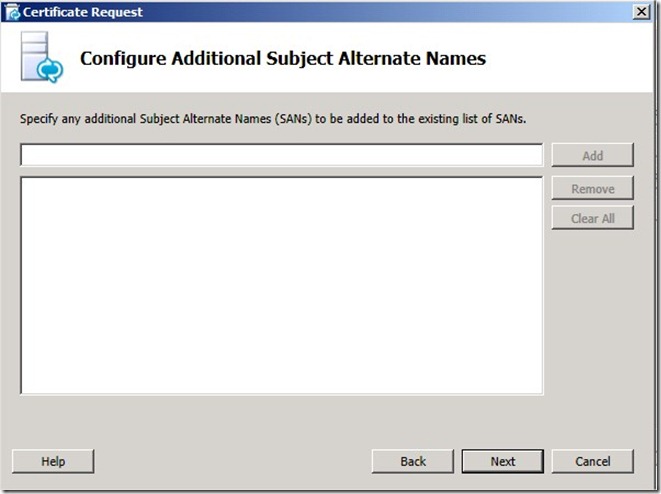
On the Configure Additional Subject Alternate Names page, leave the fields blank and then click Next.
PrtScr capture_19

On the Certificate Request Summary page, click Next.
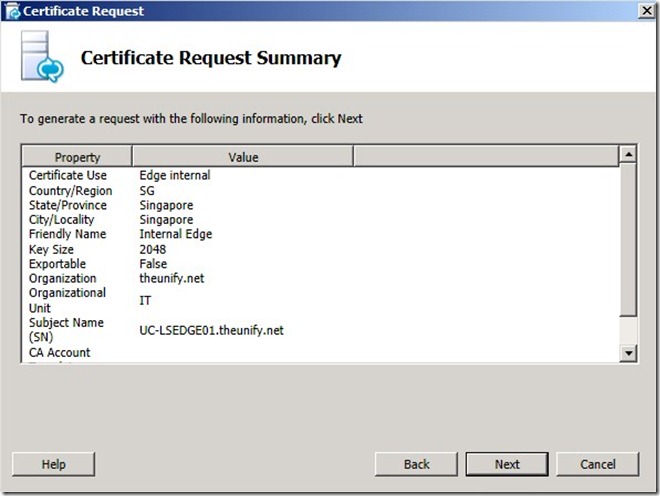
PrtScr capture_20

On the Executing Commands page, when the Task Status shows as Completed, click Next.

PrtScr capture_21

On the Certificate Request File page, and then click Finish.

PrtScr capture_22

After you have generate the internal certificate from the DC. You need to import the certificate into the Edge Server. Open up the Certificate Wizard, Select Internal Edge and click “Assign.
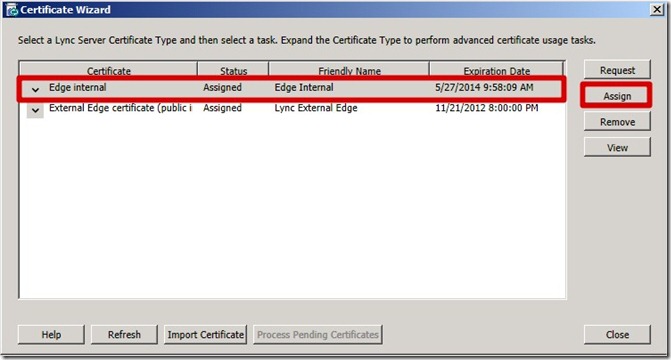
PrtScr capture

The Certificate Assignment wizard will open. On the Certificate Assignment page, click Next.

PrtScr capture_2

On the Certificate Store Select the internal Certificate, click Next.

PrtScr capture_3

On the Certificate Assignment Summary, click Next

PrtScr capture_4

On the Executing Commands page, when the Task Status shows as Completed, click Finish.
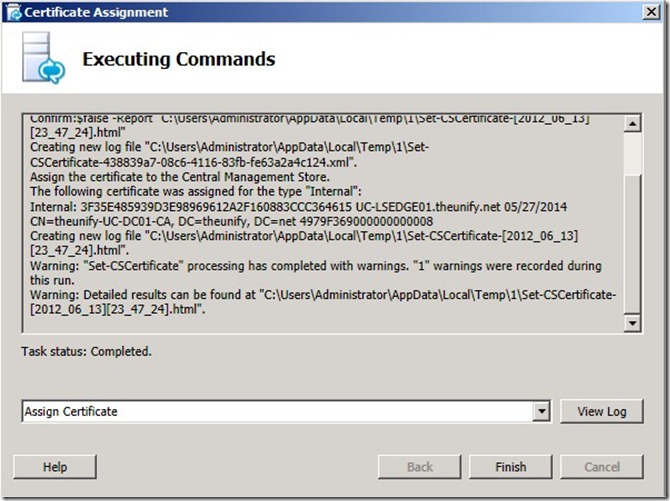
PrtScr capture_5

Back on the Certificate Wizard, under Certificate, click External Edge certificate (public internet), and then click Request.

PrtScr capture

On the Certificate Request page, click Next.

PrtScr capture_2

On the Delayed or Immediate Requests page, verify that Send the request immediately to an online certification authority is not selected, and then click Next.

PrtScr capture_3

On the Certificate Request File page, enter the path and file name and then click Next.

PrtScr capture_4

On the Specify Alternate Certificate Template page, leave the check box clear, and then click Next.
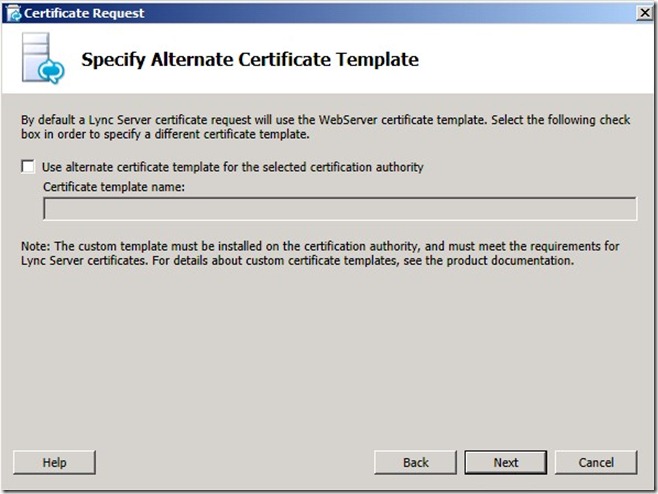
PrtScr capture_5

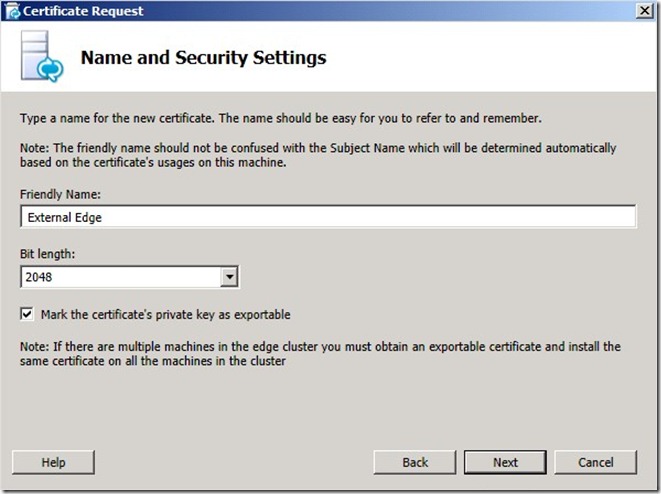
On the Name and Security Settings page, in the Friendly Name box, enter the name of the External Cert, verify that the Bit Length is 2048, and then click Next.
PrtScr capture_6

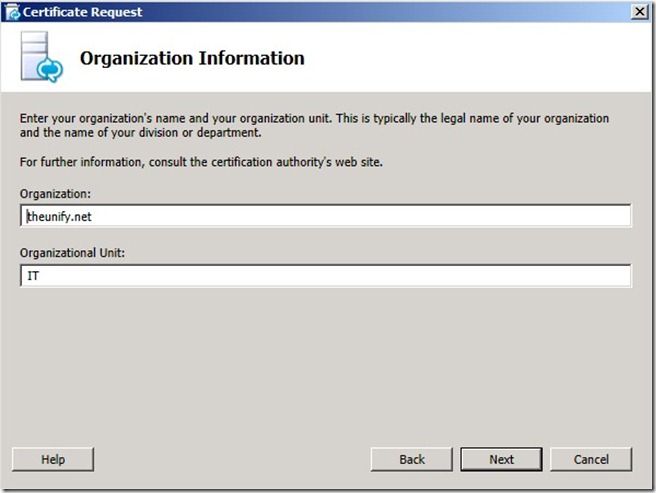
On the Organization Information page, in the Organization box, type the organization name. In the Organizational Unit box, type IT, and then click Next.
PrtScr capture_7

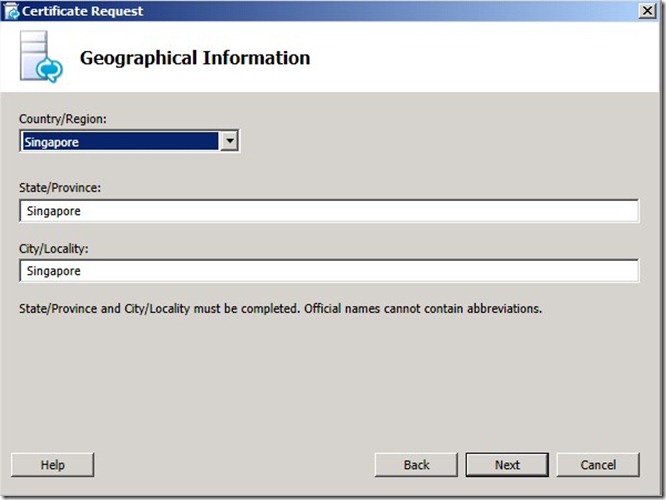
On the Geographical Information page, in the Country/Region drop-down list, click the country you belong to. In the State/Province box, type the state. In the City/Locality box, type the city, and then click Next.
PrtScr capture_8

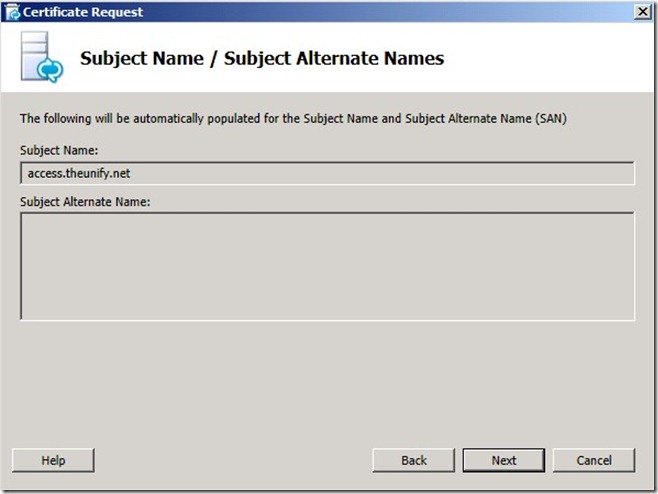
On the Subject Name/Subject Alternate Names page, review the Subject Name, and then click Next.
PrtScr capture_9

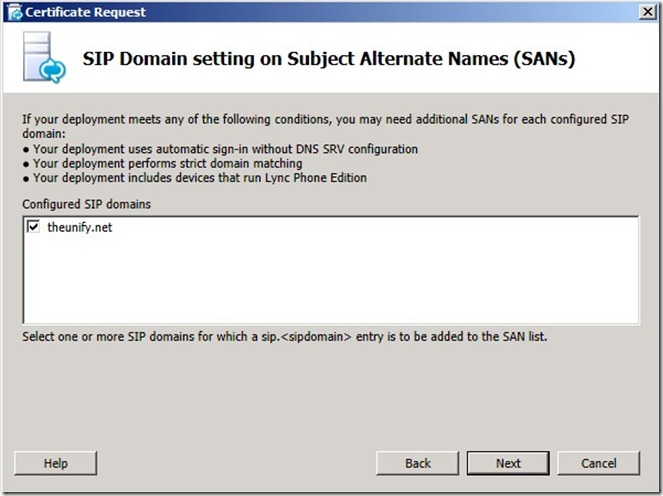
On the SIP Domain setting on Subject Alternate Names (SANs) page, select the SIP domain check box, and then click Next.
PrtScr capture_10

On the Configure Additional Subject Alternate Names page, you may enter the additional SAN and click Next.

PrtScr capture_11

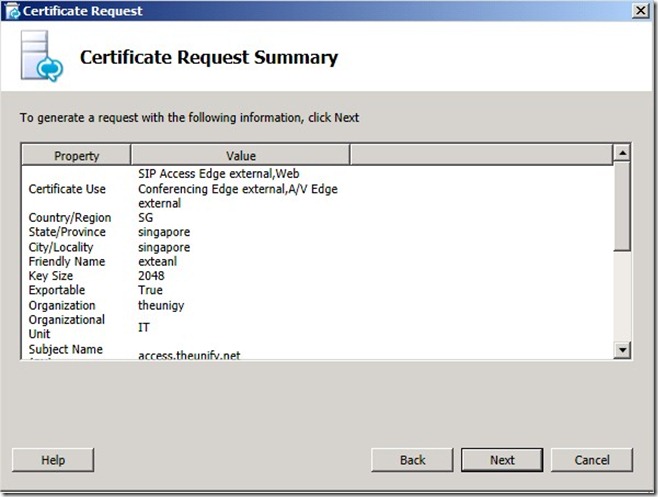
On the Certificate Request Summary page, click Next.
PrtScr capture_12

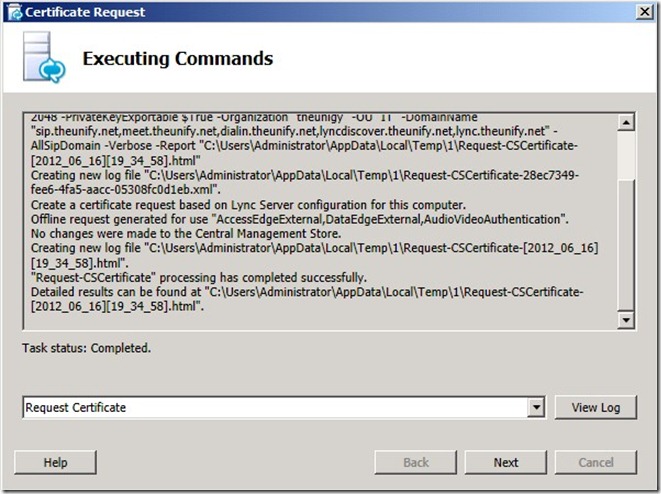
On the Executing Commands page, when the Task Status shows as Completed, click Next.
PrtScr capture_13

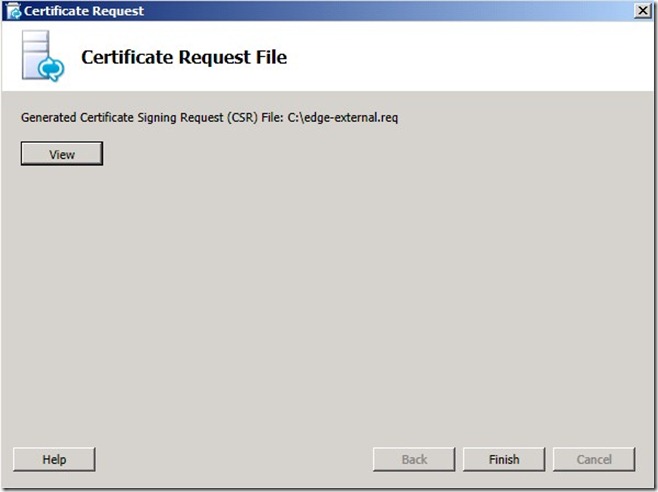
On the Online Certificate Request Status page, verify that the Assign this certificate to Lync Server certificate usages check box is selected, and then click Finish.
PrtScr capture_14

From here, you require to request to the public SSL Cert provider. And download the Certificate and import to the Edge server using MMC.

After you have done that, go back to the deployment wizard and assign the cert.

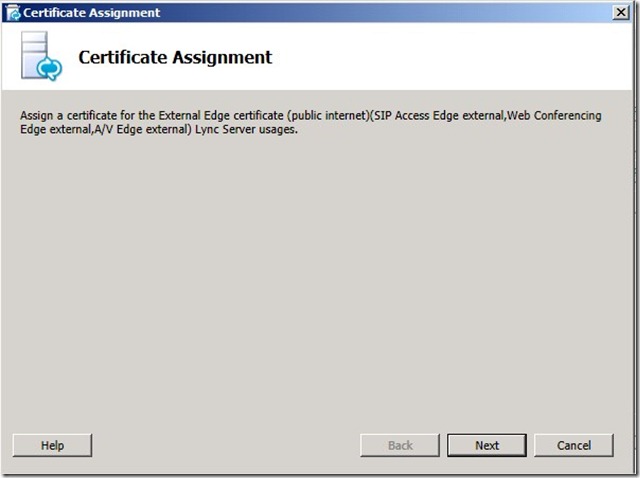
On the Certificate Assignment page, click Next.
PrtScr capture_15

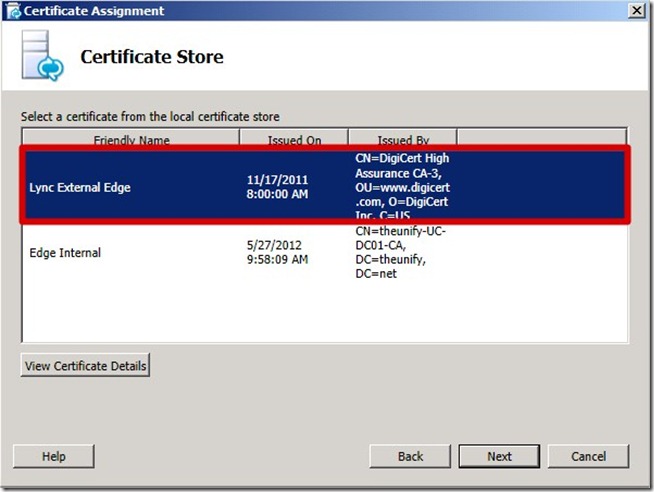
On the Certificate Store Select the External Certificate that you have just import, click Next.
PrtScr capture_16

On the Certificate Assignment Summary page, click Next.

PrtScr capture_17

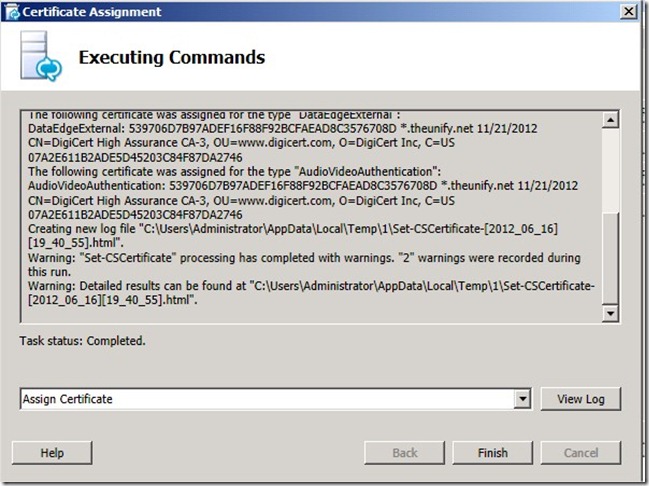
On the Executing Commands page, when the Task Status shows as Completed, click Finish.
PrtScr capture_18

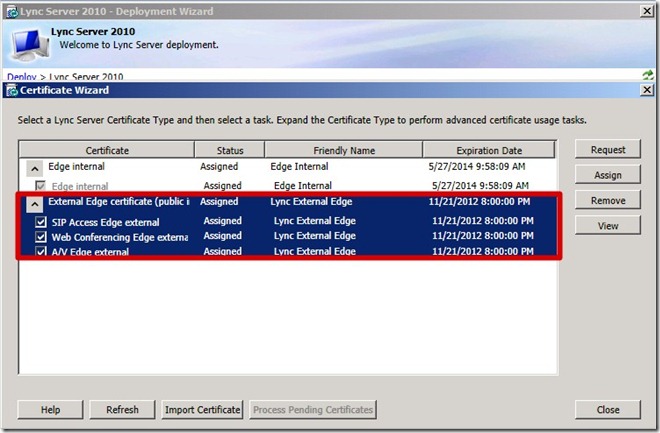
Back on the Certificate Wizard, click the down arrow next to External Edge certificate (public Internet), verify that Sip Access Edge external, Web Conferencing Edge external, and A/V Edge external show a Status of Assigned, and then click Close.
PrtScr capture_19

On the Edge Server, on the Lync Server 2010 – Deployment Wizard page, next to Step 4: Start Services, click Run.
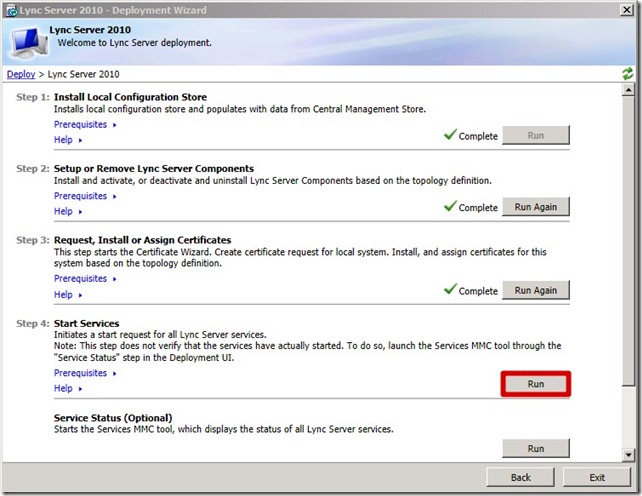
PrtScr capture_20

On the Start Services page, click Next.
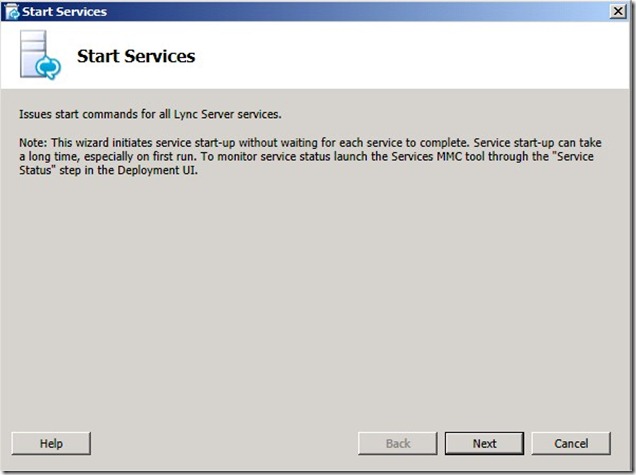
PrtScr capture_21

Wait a few minutes for the services to start. On the Executing Commands page, when the Task Status shows as Completed, click Finish.

PrtScr capture_23

Now you have done the setup of the Edge server role. You need to create the necessary DNS records for external user access. Go to your public DNS Server to create the records.

A Record
sip.domain.com – 192.168.250.250 (External IP)
webconf.domain.com – 192.168.250.251 (External IP)
avcondf.domain.com – 192.168.250.252 (External IP)

if you choose consolidate into Single IP than you to point all to same IP

Service Location (SRV)
_sipexternaltls._tcp.domain.com
Leave the Priority and Weight entries as their defaults.
Port Number: 443
Point to sip.domain.com

_sipfederationtls._tcp.domain.com
Leave the Priority and Weight entries as their defaults.
Port Number: 5061
Point to  sip.domain.com

_sip._tls.domain.com
Leave the Priority and Weight entries as their defaults.
Port Number: 443.
Point to sip.domain.com

Once done. you are all set.

below there is reference for you.

http://ocsguy.com/2010/11/21/deploying-an-edge-server-with-lync/

Next you may follow the link to configure the reverse proxy

http://blog.ucmadeeasy.com/tag/publish-lync-tmg/

Posted in Microsoft Lync Server 2010 | 5 Comments